Run Vince Analytics with Docker Compose
Vince Analytics is an open-source, self-hosted platform for monitoring your website’s traffic and performance metrics. As a privacy-focused alternative to Google Analytics, it provides valuable insights while keeping data under your control. The platform is designed for simple deployment on your own infrastructure, with the complete source code available in their GitHub repository. Learn more about Vince at their official website.
In this tutorial, we’ll deploy Vince using Docker Compose. We’ll use Vince version v1.11.2, which is currently the most recent release. Check out the releases page to see if there’s a newer version available.
Run Vince with Docker Compose
To deploy Vince on your server, create a docker-compose.yml file with the following configuration.
version: '3'

services:
  vince:
    image: ghcr.io/vinceanalytics/vince:v1.11.2
    ports:
      - "8080:8080"
    environment:
     # Change this to the URL of your instance
     - VINCE_URL=http://localhost:8080
     # Replace this with your own admin user name and password
     - VINCE_ADMIN_NAME=admin
     - VINCE_ADMIN_PASSWORD=password
    volumes:
      - ./vince-data:/vince-data
    command: serve
The environment variables in the configuration need to be customized for your setup. Update the VINCE_URL to match your instance’s URL, and set your desired administrator credentials by modifying VINCE_ADMIN_NAME and VINCE_ADMIN_PASSWORD.
Vince stores its data in a volume mounted at /vince-data inside the container. By default, this maps to a ./vince-data directory on your host system, which will be automatically created if it doesn’t exist. You can customize the host directory path by changing the left side of the volume mapping in the configuration.
Launch Vince by running this command:
docker compose up -dAccessing Your Vince Instance
Navigate to http://localhost:8080/login and sign in using the credentials configured in your docker-compose.yml file. The login interface will appear as shown:

Setting Up Website Tracking
To begin monitoring a website, locate and click the Add Website button in the interface:

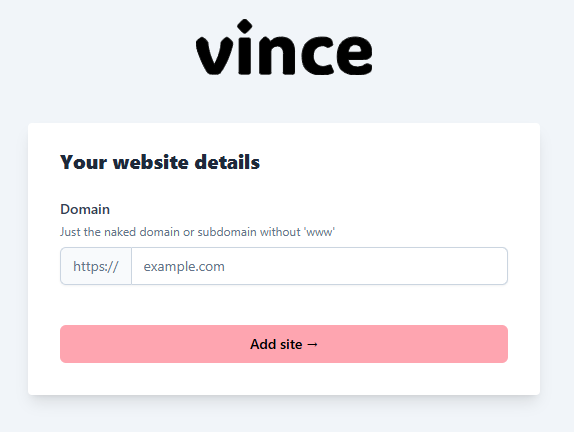
When entering your website details, specify the domain name without including ‘www’ - use either the primary domain or a subdomain:

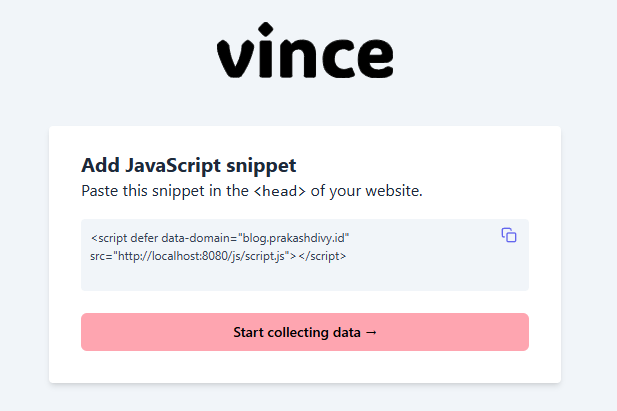
After adding your website, you’ll receive a tracking script that needs to be placed within the section of your site. Once you’ve implemented the script, click ‘Start Collecting Data’ to begin monitoring your analytics:

Monitoring Your Website
Once your website configuration is complete, you’ll be able to monitor your site’s performance through the analytics dashboard. This interface displays key metrics such as visitor counts, page view statistics, and additional performance indicators.
